Showing posts with label crafts. Show all posts

Saturday, August 3, 2024

Project Backdrop

 Advanced Cobbled Trash (tm).


I mentioned to Miss Moon that I had a super simple photo backdrop, and that wasn't a lie. It's just been some interesting times here for the past month. 


I'd tried making a photo box out of an old banker's cardboard box and some tracing paper years ago, and that worked...okay.  Later I attempted paper-mache'ing it and adding some reinforcement in the form of actual hinges since it had been getting pretty beaten up in various moves. It doesn't get a ton of use just because of its size. 

Moving into the new place opened up some spacious options, though. I have a kitchen island I use for a workspace, and wanted a backdrop stand to fit it.  Unfortunately, I have no idea what the technical terms for the parts that make those things are, and I didn't want to buy one prefab off Amazon.  They're a little pricey there. I might cave eventually if I need a larger one, though.

The basic construction is simple; I mean, all it is is a T shape with some clips and a counterweighted base of some sort. Bonus points if you can make it adjustable or telescoping somehow (I didn't lol).


The clip I've had for years. It's from that one time Sephora was junking a bunch of their display hardware. There are a few other attachment pieces hanging around, I have another one I use to hold a work light.

The main body of the T is a fortuitous find I made while staring blankly at the poster frames at Walmart. It's actually a piece of packing material from a case of lampshades. I was delighted to find some kindly stocker had left it on the shelf and nobody noticed it.  The extra black piece at the top is from the center of a roll of cheap pooper-scooper bags. Nowadays I get the recycled ones because they come in lavender and those have cardboard tubes, which would probably work just as well.

I took a dowel rod and ran it between those two plastic tubes, then filled that with hot glue to keep them together.

The double ended poster clips I found at Office Depot, I think. Big ups to the employee who tried to understand what I was asking for. If memory serves they come in a bag of about 10-12 for around $10.  I just took the clip off one end of one of them and hot glued that into the end of the upright. The rest should be pretty evident from the photo. 


The Sephora clip holds the foot of the lamp packaging down to the countertop pretty nicely. I should find a better way one of these days since it gets wobbly if I have something heavy hanging on it, but for now it works.


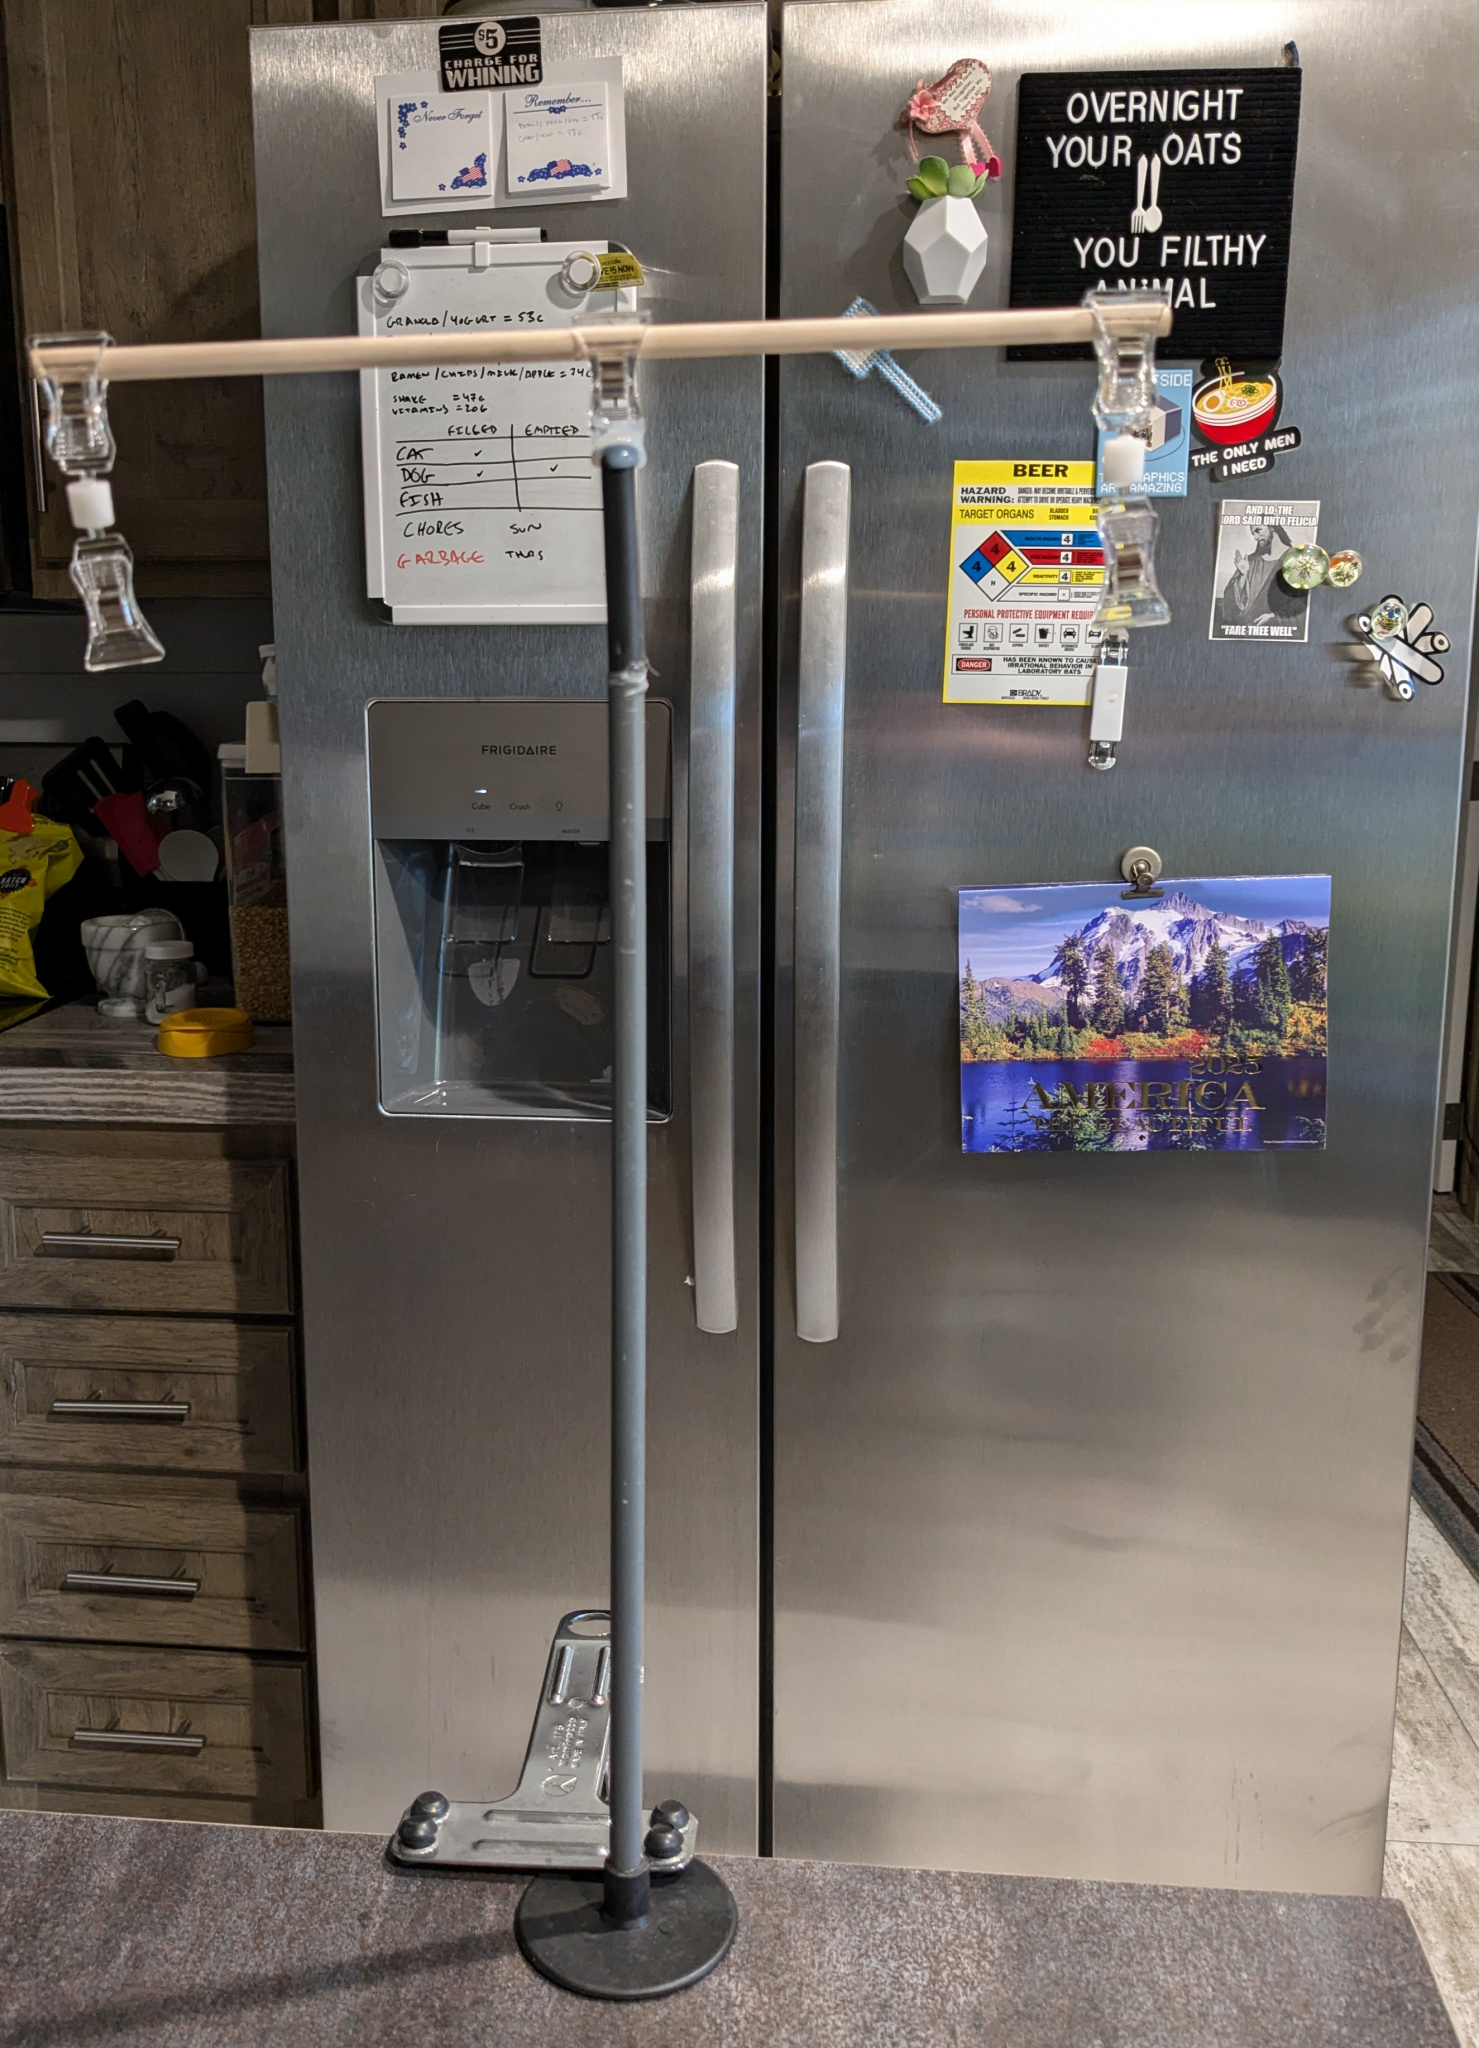
Enjoy the fridge-front clutter.  The stand is about 15" high? I never actually measured it, but you can capture an entire Barbie with the right framing without seeing the edges. 


Ideally I'd probably want a curved piece of posterboard, but this folded one is what I had on hand and it also does fine. The double jointing on the clips lets me raise and lower the backdrop if I want.


You can get some good basic shots with it, and it won't destroy the budget. The backdrop in this case is a piece of printed felt from the craft store =p

Tuesday, May 23, 2023

Build Time - Photo Backdrop PLUS

AKA, let's see how far we can stretch the concept of slapdash...

Modular walls round 2.  I have a small hoard of backdrop-viable materials anyway and have been putting off making more of them for some unknown reason, but something in the bargain bins at Target caught my eye a few weeks ago.

iirc these were about $3 each, so not too bad.

I already had the silicone molds for the bricks and a few other things, and an idea popped into my head on how to make decent use of them.  Does anyone else remember a few years back when the craft stores were trying to make hot-glue casting a whole thing?  Did I imagine it??

gotta love how even the promo image admits the texture doesn't tile.

Got this at the Dollar Tree - it's supposed to be a wall decal, but it works just as well as a floor.  It's 3d, of course.  I might go over it with some matte varnish, since those stones are awfully shiny.


Our usual Rogues' Gallery of materials, this time involving the addition of toilet paper rolls, scrap felt and some Christmas village grass (still pressed out and flattening as of this post).  I cut the foamcore (also scraps) to fit the foliage mats, so they're about 12" wide, give or take, and 24" long.

not the final product. variations from packaging may occur.

So the end result should look something like this, but much better since y'know...the bricks will be painted.  RIP my hot glue stash at this point, because I made ten of these panels of bricks and there wasn't much wastage.  Even not glopping it into the molds it still ate almost all my sticks.


So I got to work gluing the bricks on - each panel only needed four on the front.  The extras were for the sides and what would be the centerpiece, because....


Obviously at this size, they either won't meet in the corner, or will leave the edges wide open to break the immersion.  I opted to cover the center's sins.  Also added that faux ledge across the top to balance things out.


It's just some scrap foamcore wrapped in felt and glued on.  The method behind this madness will become apparent eventually, I promise.


This is just four rolls glued together, shored up with craft sticks, and covered in more felt.  I banded the ends with more of the hot glue bricks.


99% of the paint colors used.  Not pictured is the English Ivy Green, Licorice, or Country Grey used later.  Leave it to the store to not have either burnt umber or brick red in stock when I appear.

base coat acquired.

A base of 50/50 terracotta and tuscan red, for starters.

my eyes!!

A sort of whitewash with vanilla, for the grout. It's blinding.

much better.

I went over this with a sort of dark wash of the tuscan red and a little of the dark brown, then asked my roommate to get me some spouncers while he was out (I was at work).  Spouncer is such a silly word.  Anyway, I then spounced on some tuscan red, and drybrushed with the terracotta to bring out the texture.


General consensus being that the grout was still way too bright, it also got another wash, this time with just the dark brown.  Roommate approved, we were ready to go on.  The felt parts for painted over with a mix of the vanilla toned down with the country grey, because to my mind painted felt looks a lot like a smooth stucco or molded concrete.  Tacked on the foliage mats and...

should do something about the wall brackets, lol.

Voila!  These are not the most stable things on earth, but the center pillar helps to hold the walls up, so I call it good.


I think it works, more or less.  How about you?  I'm planning to do something similar on the opposite sides of the wall pieces, but not right this minute.  I need a break.

Thursday, May 18, 2023

Build Time - Photo Backdrop

This was another thing I did back in 2021.  Newer projects are coming - there's just a little thing called Tears of the Kingdom standing in the way right now.  It took me forever to track this video down.  Please appreciate =p

A while back, Froggy made a doll room with modular walls, to expand on her awesome "hidden" style rooms.  I liked that idea, and I had a whole bunch of scrapbook paper and scrap fabric to make use of, so I figured why not make some of my own?  But of course, me being me...it got out of control pretty quickly.

Walmart garbage is about to make a reappearance, brace yourselves.

Ignore the visible toes and the fact I clearly haven't got my eyes on while taking this picture.  In this lineup we have a piece of a box (I think it came from a lamp case or similar), some scrapbook paper, and the backdrop from the Bob Ross figure I have.  You'll find out why that's there in a minute.


I measured my backdrop piece according to Froggy's guidelines, then traced around the inside of the circle on the trash piece and cut that out.  I wanted this to be a somewhat functional window, in that whatever's visible through it could be interchangeable.


...sloppy.

Covered that with the scrapbook paper and recut the hole.  I'm not super careful with my knives and have yet to designate a public-access exacto, so I keep grabbing the wrong one, with the dull blade of course.  Raise your hand if you understand.


Cut out the original hole, then laid it on top of another piece of trash cardboard and did some more tracing and butchery to end up with this.


Yes, yes it is off-center.

Here's where we get fancy, of course.  I wanted some "glass" in there.  Enter the famous Plastic from Doll Packaging (tm), except unlike last time with the TV, I didn't have one single large piece.  I had two usable ones and had to get creative about finagling them in there.  I wrangled these in between the cardboard circles at angles and then distressed them a bit to make them look more like cracked glass.

Then I added some hot glue rivets.

*Fancy* Cobbled Trash (tm)


Went over this with tissue mache again to soften some of the edges and make the whole thing look more like one piece than cobbled trash...


I could have sanded this, or added more layers to remove the wrinkles, but eh...  That's the same silver paint in use, by the way - the bottom ring got a dark wash with black and the top one got burnt umber.  I think I drybrushed the top one with copper or bronze.  Gave it a sealant spritz which fogged the glass and added some (also trash) fake greenery for effect.


It's a little hard to see, but the porthole surround is actually set into the wall a little bit.  The whole thing got a coat of Podge for extra texture.  This thing isn't just distressed, it's straight up traumatized.


This one isn't double sided like my other ones, specifically because I wanted to be able to have light pass through.  There's a piece of cardstock on the back, with enough clearance to slide another piece of paper or thin card between that and the foamboard.  Interchangeable scenery!


It fits into the base piece nicely and is light enough to stand with no problems.  The same can't necessarily be said for the newest addition to this collection, lol.  But we'll see how I compensated for that next time.


She always wanted to try standing in front of this window!


Thursday, April 27, 2023

Let's Get Started, Shall We?

And that pretty much brings me to the present day.  Current Year, as the kids say.  I'm still going to be tweaking a few things, but the old posts are all ported over.  So.


Hi.  I'm Setsu.  Known generally online as Setsu-P, sometimes P-tan depending on how I'm feeling or who you ask.  I have a long and sordid history spanning various forums, Livejournal, Deviantart and a short stint on Tumblr.  My main site's elsewhere, but I moved all my craft stuff and toy photos over here, because I've been hooked on the doll bloggers for ages (Toybox Philosopher started me off way back in the day and it just spiralled out of control from there) and the dolly community here seems like a nice bunch of folks.  I'm looking forward to interacting with y'all from here on out.

I dabble a bit in collecting, a bit in customizing, a lot in crafting, sometimes in drawing or pixel work, spend too much time gaming, and have touched a lethal amount of grass in this life.  I'm coming up on 45 and my friends are why I don't need children.  I'm the Fun Auntie.  I have a very special cat, some extremely spoiled goldfish, and a few long-suffering house plants.  And a thriving compost pile.  You really can't mess up compost.


I won't bother posting my to-do list, although in all honesty I probably should at this point if only to help people shame me into getting it all done finally.  TL;DR, the next things up should be some accessory repaints and the vintage restorations I'm working on at the moment.  Most of the tags should be pretty self explanatory.  TMIT is my own invention.  It stands for ToyMuchInformation Tuesday.


Nice to meet you all :'D


I'll leave you with a few photos of stuff I used to sell on Etsy (or tried to, anyway).


This was actually a gift for my brother, for his second wedding in 2012.  The lighting effect was a happy little accident.  It's a hand carved and decorated chicken egg.


More carved eggs.  I think I still have the prototypes for a green set around here somewhere.


Painted glass cabochon magnets.  The ones in the middle glow in the dark.


And I made a few fascinators for friends, based on their fan-characters.